Managing your Partner Credentials
You should now have received user credentials to log into your partner account we have added for you.
Within this account, you can access key information you'll need for your integration including your client credentials, HMAC secret and also both your registration URL and branding.
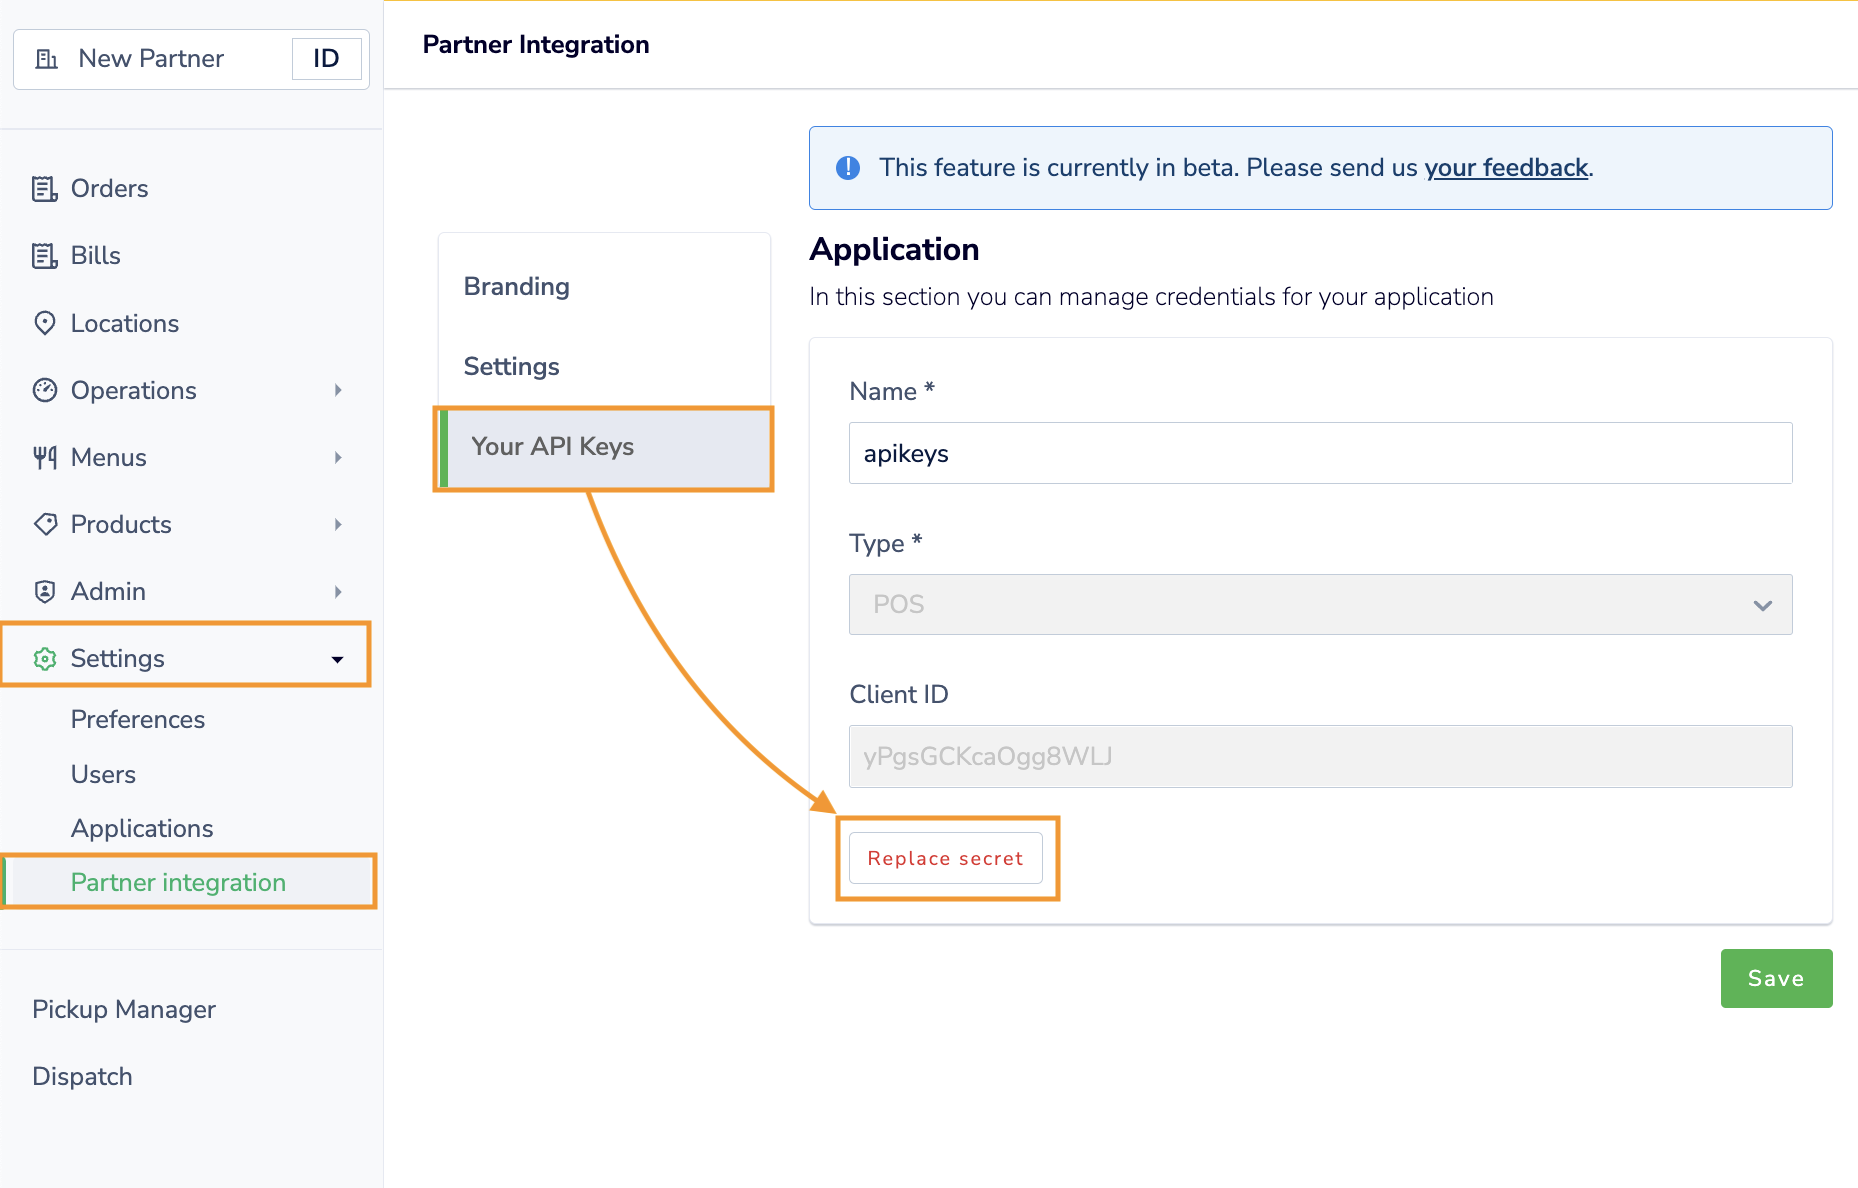
Client ID & Secret
To obtain your Client ID and Secret follow the below steps;
Step 1: Go to Settings > Partner Integration > Application
Step 2: Click on the section titled with your integration name
Step 3: You should re-generate the secret by clicking on "Replace Secret" and ensure this is safely stored.
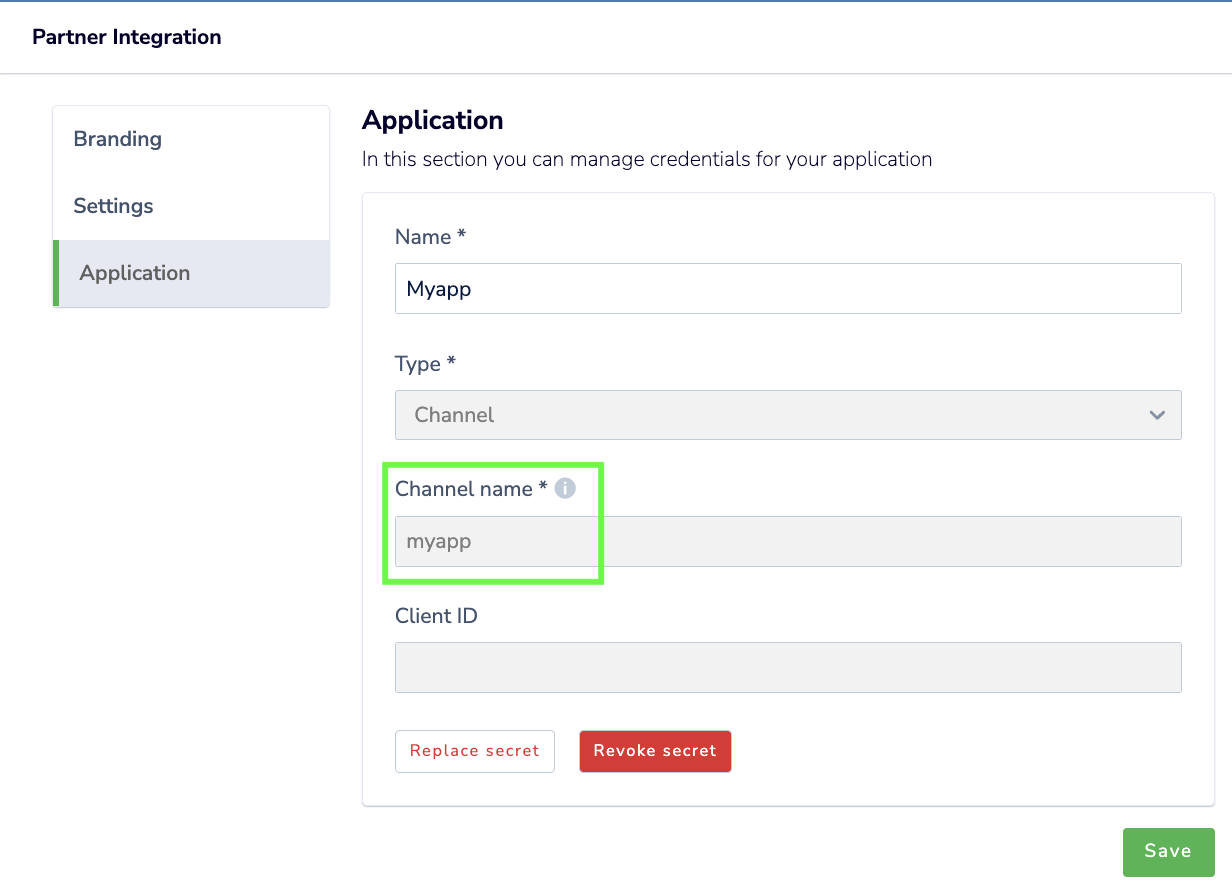
Obtaining a Channel 'Scope'
For any certified channel partner, the 'Application' section will also specify your 'Channel Name' which would form your 'scope' used when creating orders
Channel name - case sensitiveDeliverect will provide a channel name in lower case without spaces or special characters, this scope needs to be applied in your integration as shown.
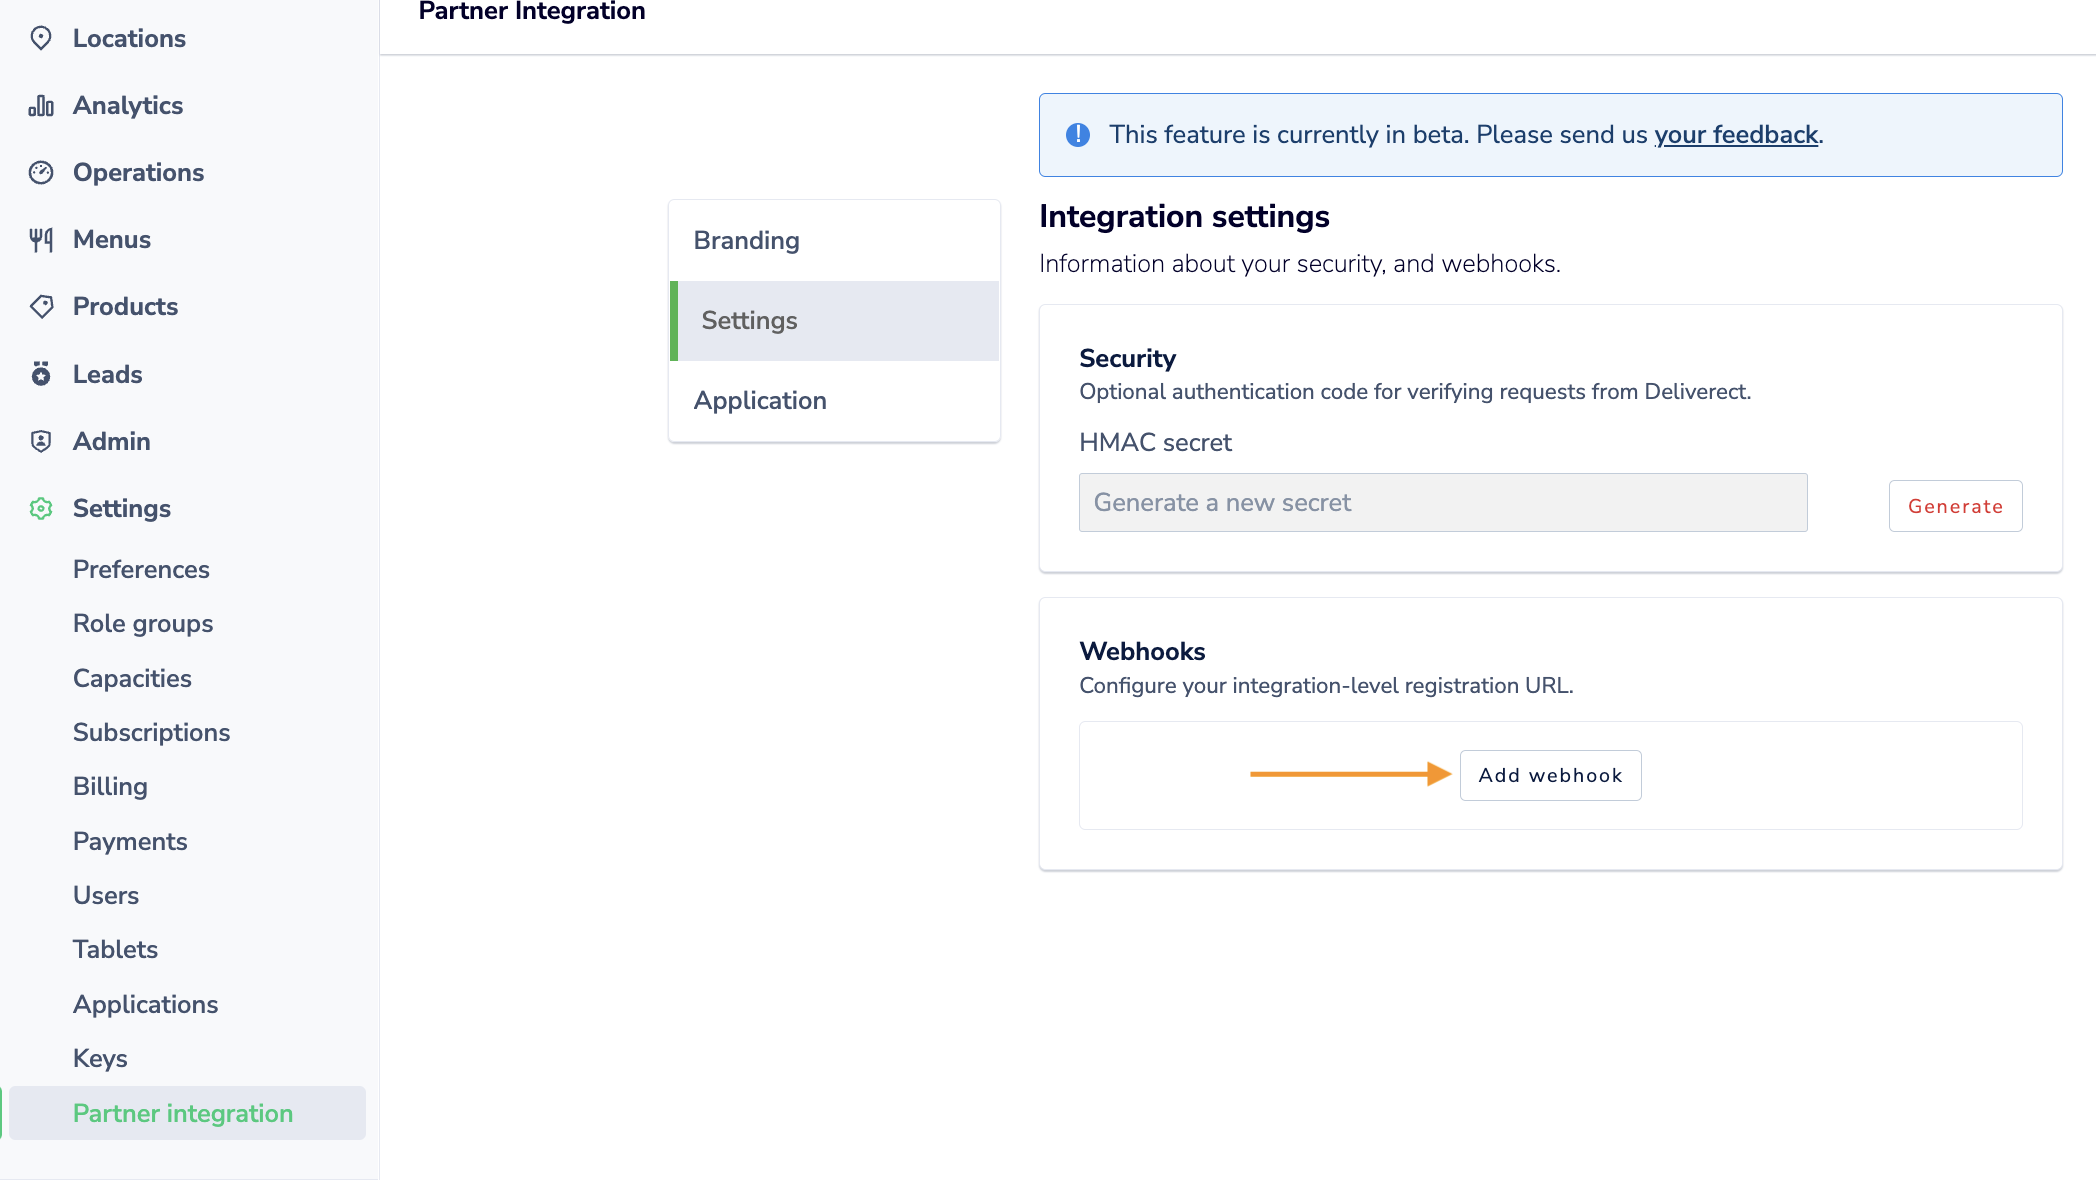
HMAC Secret & Registration URL
Authenticating requests with an HMAC secret is optional, but you can generate this as required NB: When generated, the substitute of using the channelLinkId no longer applies.
As almost all integrating partners will set a standardised registration URL, you can configure this to apply to all your accounts via the section 'Webhooks' > 'Add webhook'
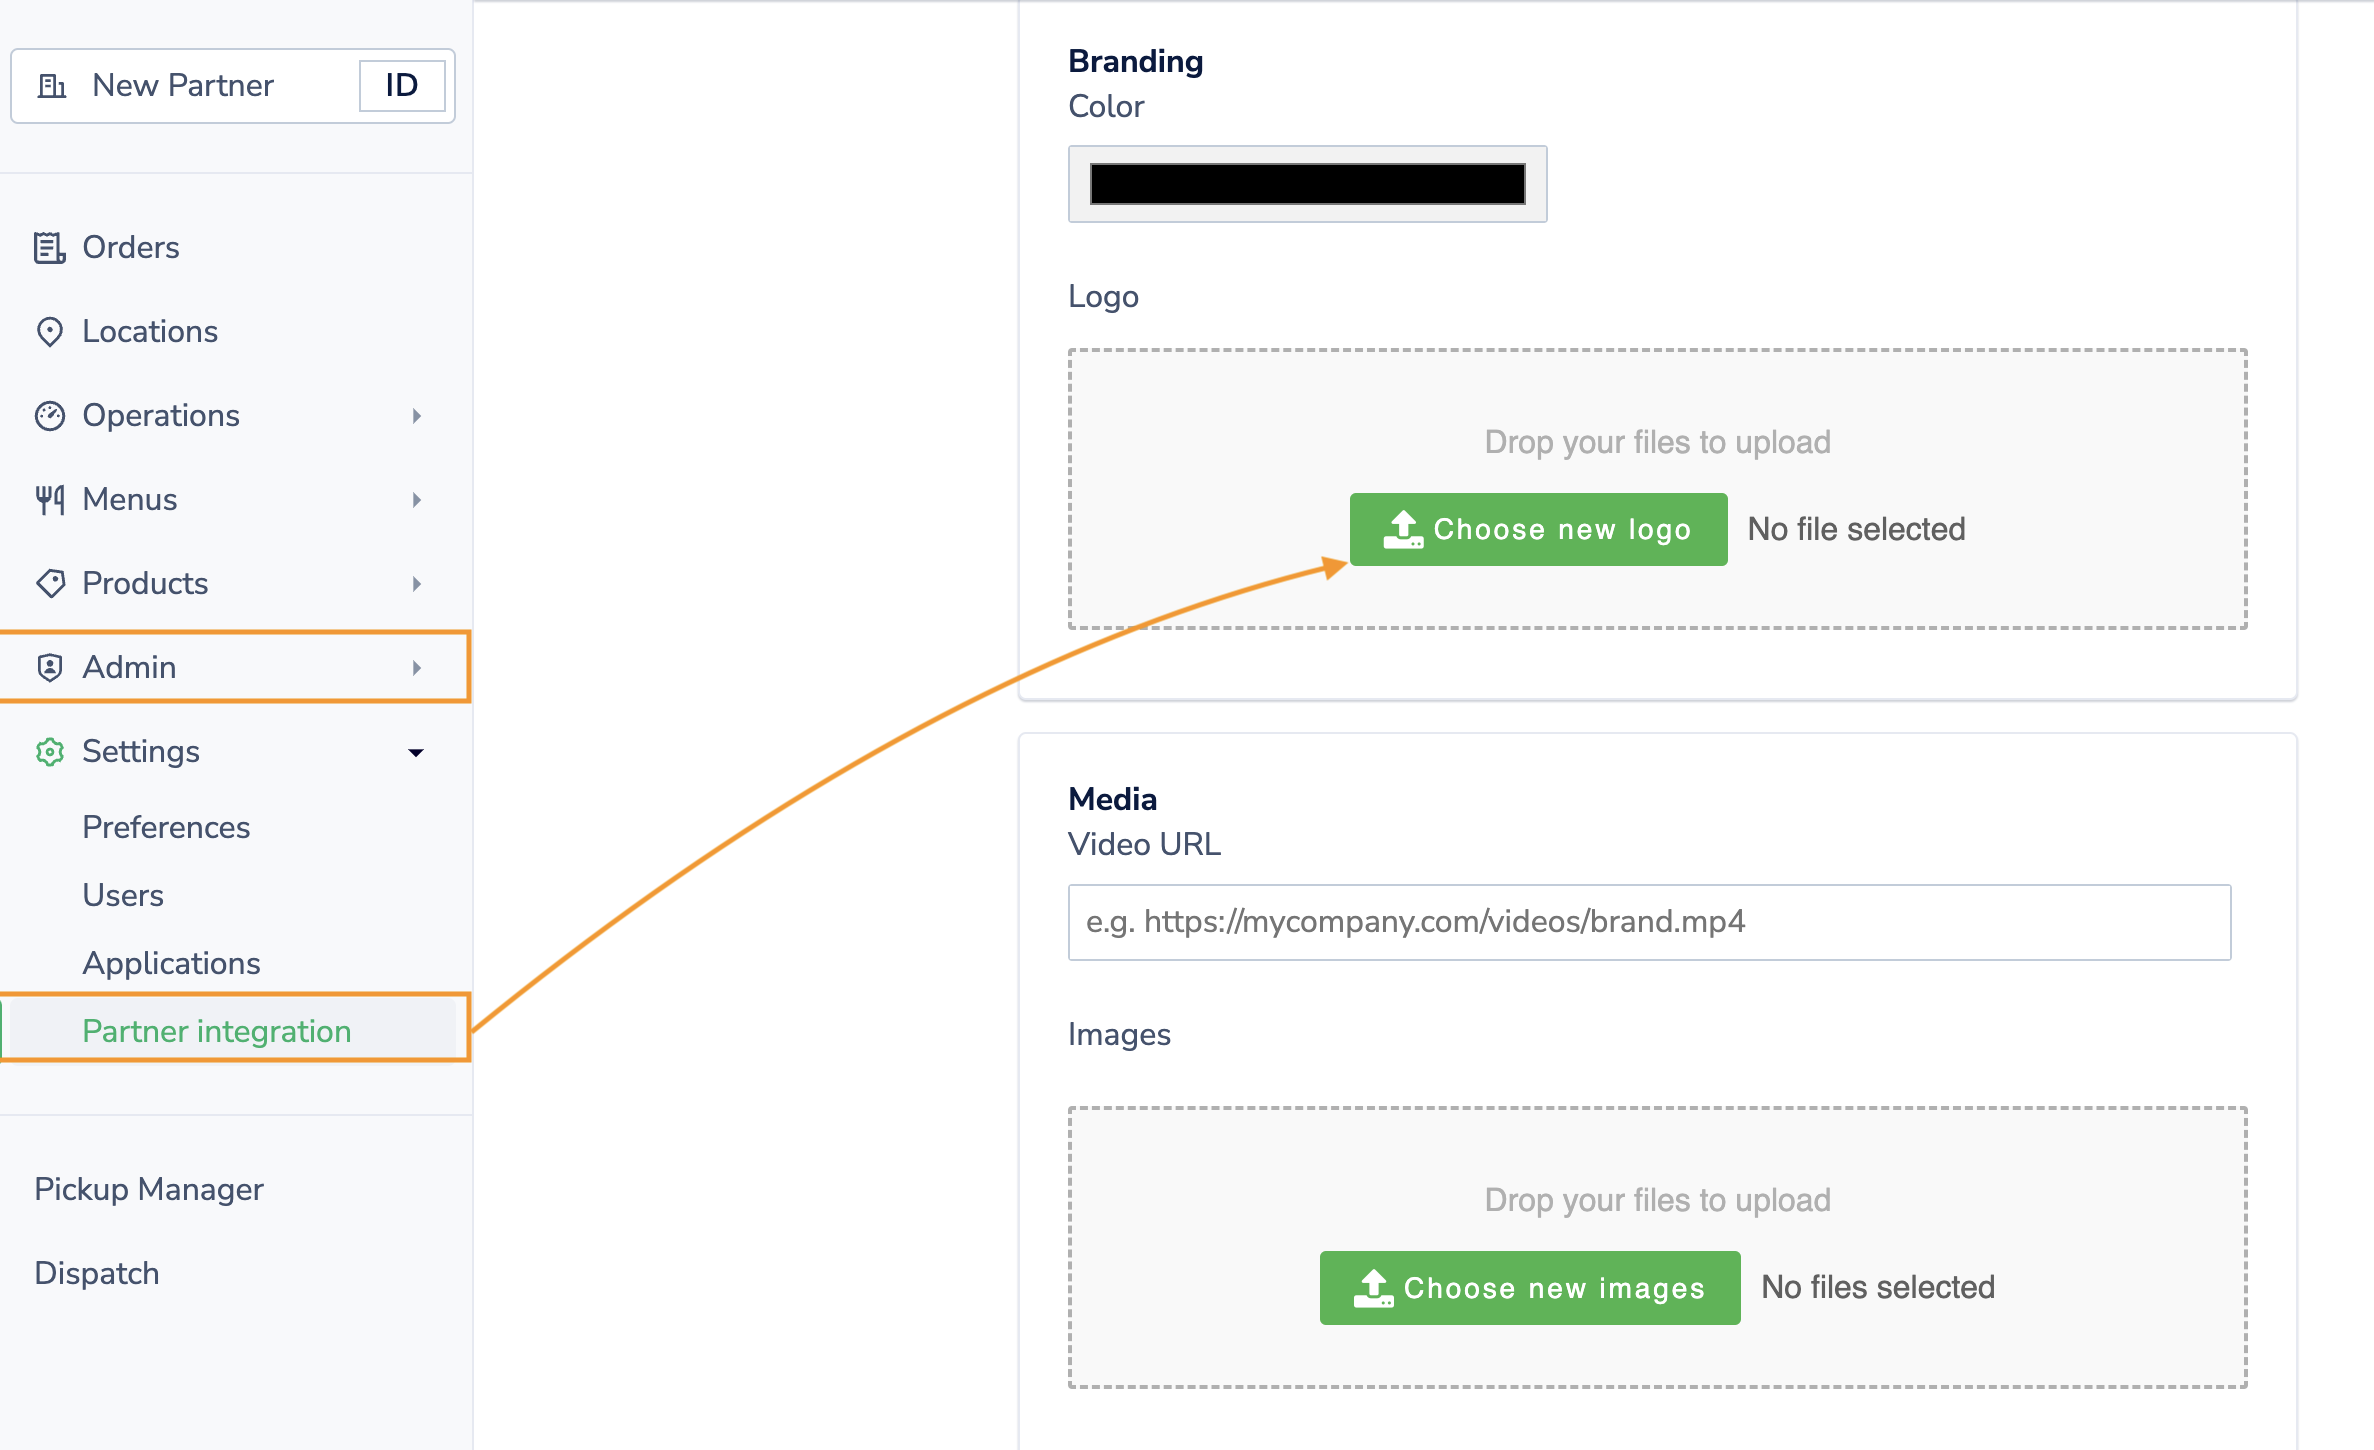
Branding
You can amend your logo and set your brand colour by following the below steps:
Step 1: From 'Partner Integrations', click on 'Branding'
Step 2: Click to upload new logo file in PNG format with transparent background
Step 3: Click 'Color' and enter your RGB colour or select from the color wheel
Step 4 Please also add any other helpful information about your integration e.g.
- A recording of your integration or promotional video content (not essential)
- Countries in which you are active (important for website listings)
- Long and short description of your platform (to be visible on our Marketplace)
- Website, Privacy Policy and FAQ URLs (included in your Marketplace listing)
Step 5: Scroll down to the bottom of the page and click on "Save"