

How to configure Price Levels
Introduction
All Product and Modifier items include a base "price" field. Optionally, additional prices can be defined using "priceLevels" in order to support different pricing for specific ordering channels and menu fulfilment type.
Format
A "priceLevels" object for a product or modifier should include:
- A price level property name which will be it's unique identifier.
- An corresponding integer value defining the price to apply
The price level identifier set must also be defined in a "priceLevels" array, where each entry requires:
"posId"– this is the unique identifier referenced in product and modifier price levels."name"– a descriptive label which will be displayed in channel settings.
When configured as in below example, price levels can be mapped via channel link settings to a specified menu fulfillment type e.g. a 'First Party' channel can have a unique price level for each 'Delivery' , 'Pickup' and 'Eat-in' menus and is configured in a channel mapping process ia described below.
Example
In the example below, a product will be sold at different prices when correctly mapped on the ordering channel:
{
    "products": [
        {
            "name": "Ginger Beer",
            "productType": 1,
            "plu": "DRNK-03",
            "price": 350,
            "priceLevels": {
                "TA": 350,
                "DL": 400,
                "1PO": 300
            }
        }
    ],
    "priceLevels": [
        {
            "name": "Takeaway",
            "posId": "TA"
        },
        {
            "name": "Delivery",
            "posId": "DL"
        },
        {
            "name": "First Party",
            "posId": "1PO"
        }
    ]
}Configure Price Levels
Once you have sent price levels from a POS, you can follow these steps to configure them for a channel.
Step 1. Go to your customer account on staging.
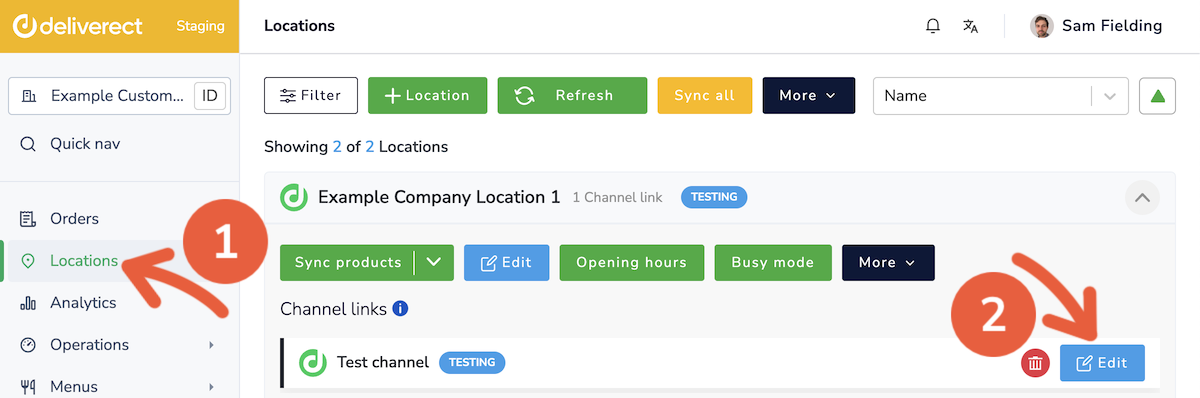
Step 2. Select Locations in the sidebar ① and then the Edit button for the channel ②.
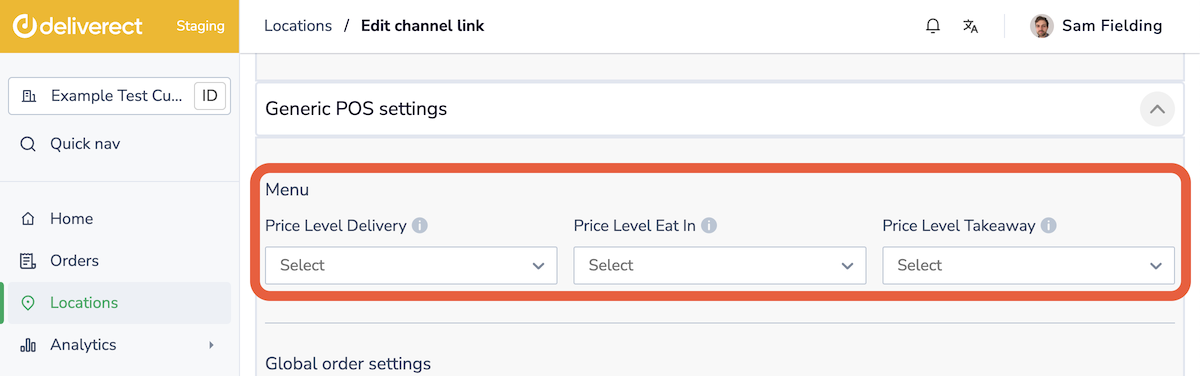
Step 3. In the POS settings section, select the price levels sent by the POS in the Price Level fields.
Step 4. Select the Save button at the bottom of the page.
Step 5. Verify the configuration by previewing menus and switching between channels.
Updated 2 months ago