

How to handle Translations
Overview
Below are the sections of a menu which are translatable along with the object name where the translations will be set;
| Section | Attribute |
|---|---|
| Menu Title | menuTranslations |
| Menu Description | descriptionTranslations |
| Category Name | nameTranslations |
| Category Description | descriptionTranslations |
| Product Name | nameTranslations |
| Product Description | descriptionTranslations |
Examples
Below are samples of how these translations will show in a menu payload;
{
    "nameTranslations": {
        "es": "Deliciosos Bistecs Fritos",
        "fr": "Steak Frites Delicieux",
        "nl": "Heerlijke Biefstuk Frites"
    }
}
{
"menuTranslations": {
"es-mx": "menú de muestra",
"fr": "Exemple de Menu"
}
}{
"descriptionTranslations": {
"es": "Deliciosos Bistecs Fritos",
"fr": "Steak Frites Délicieux",
"nl": "Heerlijke Biefstuk Frites",
"ar": "شريحة لحم فريتس",
"el": "Νοστιμη χοιρινή παντσέτα με πατάτες"
}
}Language Codes
See the full list of translation codes via the link below;
How to test translations
If a channel is to support translations, the following steps can be covered to test setting translations in menus;
Step 1: Access the Customer Account
Sign in to the Deliverect test customer account using your credentials.
Step 2: Navigate to Menus
Once logged in, you are directed to the main dashboard. Look for the "Menus" tab in the navigation menu and click on it.
Step 3: Edit Menu Items
In the Menus section, you can see a list of menus available. Select the menu you want to edit and click on the "Edit" button next to it.

Step 4: Edit Items
After selecting a menu, you can see a list of items within that menu. Locate the specific item you wish to edit and click on the three dots (...) located next to the item's name. Click on these dots to reveal a dropdown menu.
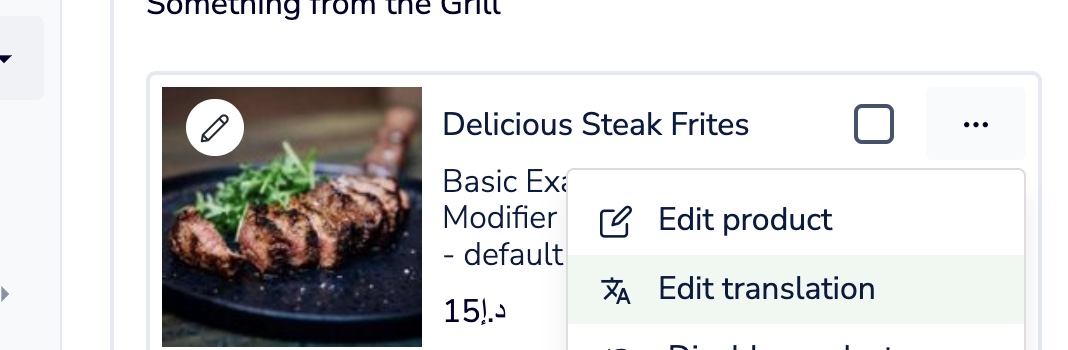
Step 5: Choose Edit Translations
In the dropdown menu, select the "Edit Translations" option. This action opens up a new window or section where you can manage translations.
Step 6: Select Language
In the translation editing section, you see a language selection dropdown. Click on it and choose the language you want to edit the translation for.
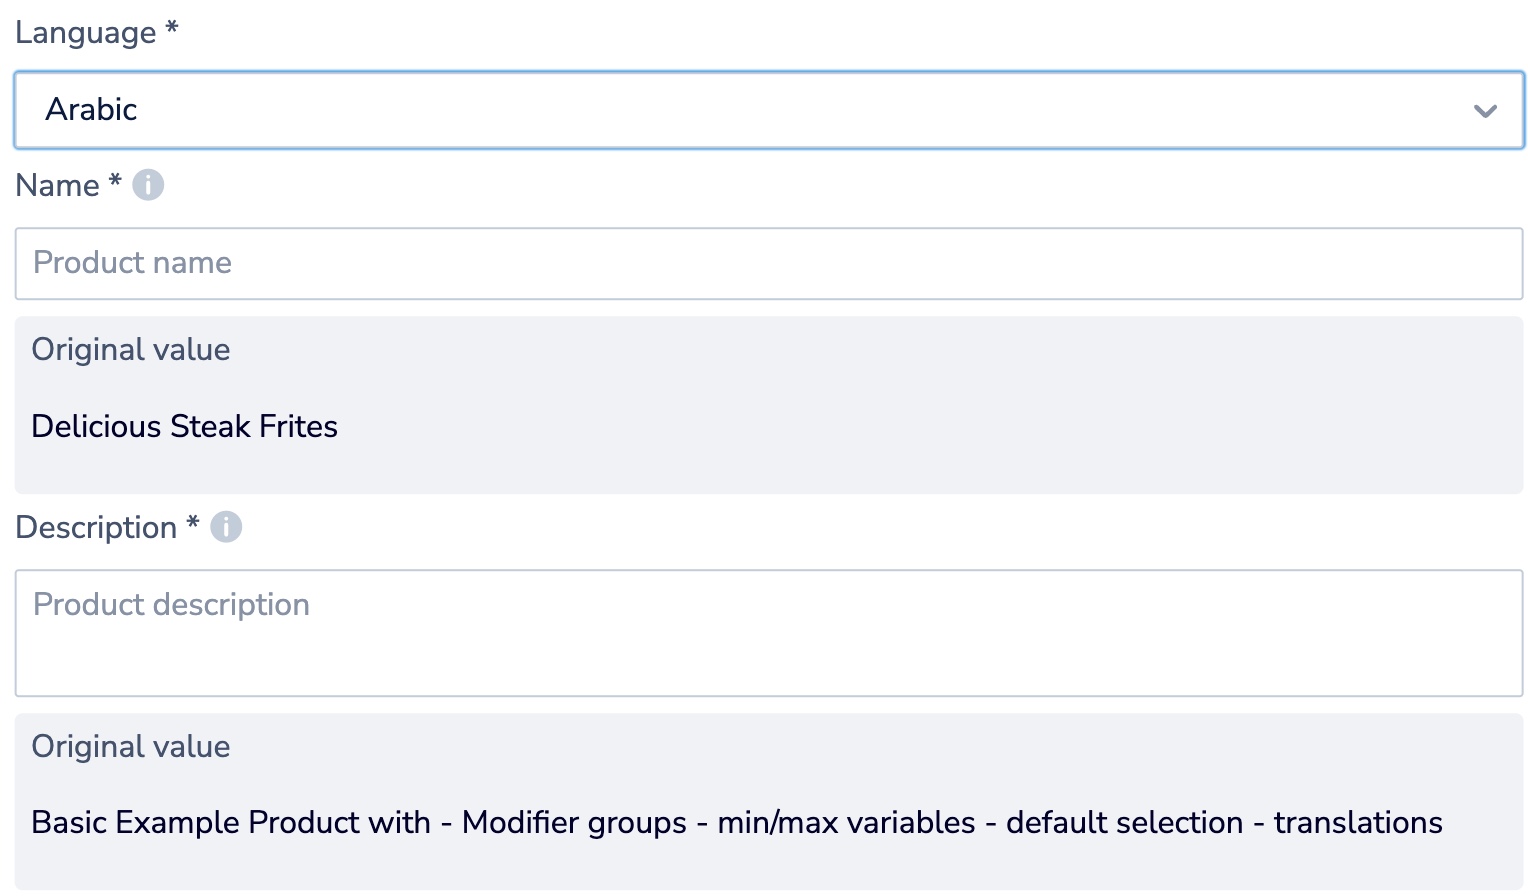
Step 7: Edit Name and Description
Once you've selected the desired language, you can see the existing translation for the name and description of the menu item. Edit the name and description fields as needed.
Step 8: Save Changes
After making the necessary changes to the translations, don't forget to save your work.
Step 9: Review and Confirm
Before finalising the changes, please review the edited translations to ensure accuracy. Verify that the name and description are correctly translated in the chosen language.
Step 10: Repeat for Other Items
If you need to edit translations for other items in the menu, repeat steps 4 to 9 for each item.
Step 11: Continue Testing
With the translations edited and saved, you can publish the menu again to your Menu Webhook URL to continue testing and ensure that the changes have been applied correctly.
Updated about 2 months ago