Activate a Channel
To add a channel registration webhook URL and deliver the webhook containing channel IDs, follow the steps below:
Step 1. Go to your customer account on staging.
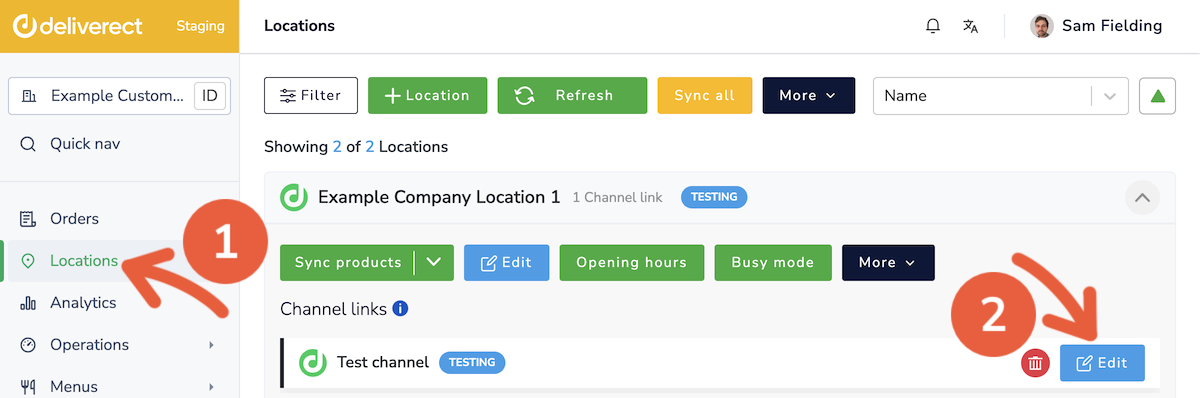
Step 2. Select Locations in the sidebar ① and then the Edit button for the channel ②.
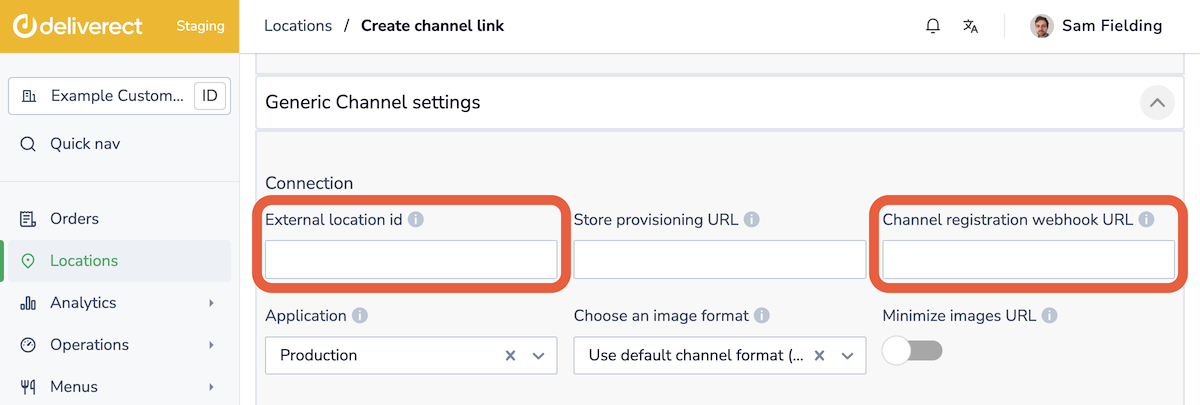
Step 3. Complete the following fields:
- External location ID: The ID you use in your system for the customer location.
- Channel registration webhook URL: Your webhook to receive channel status updates.
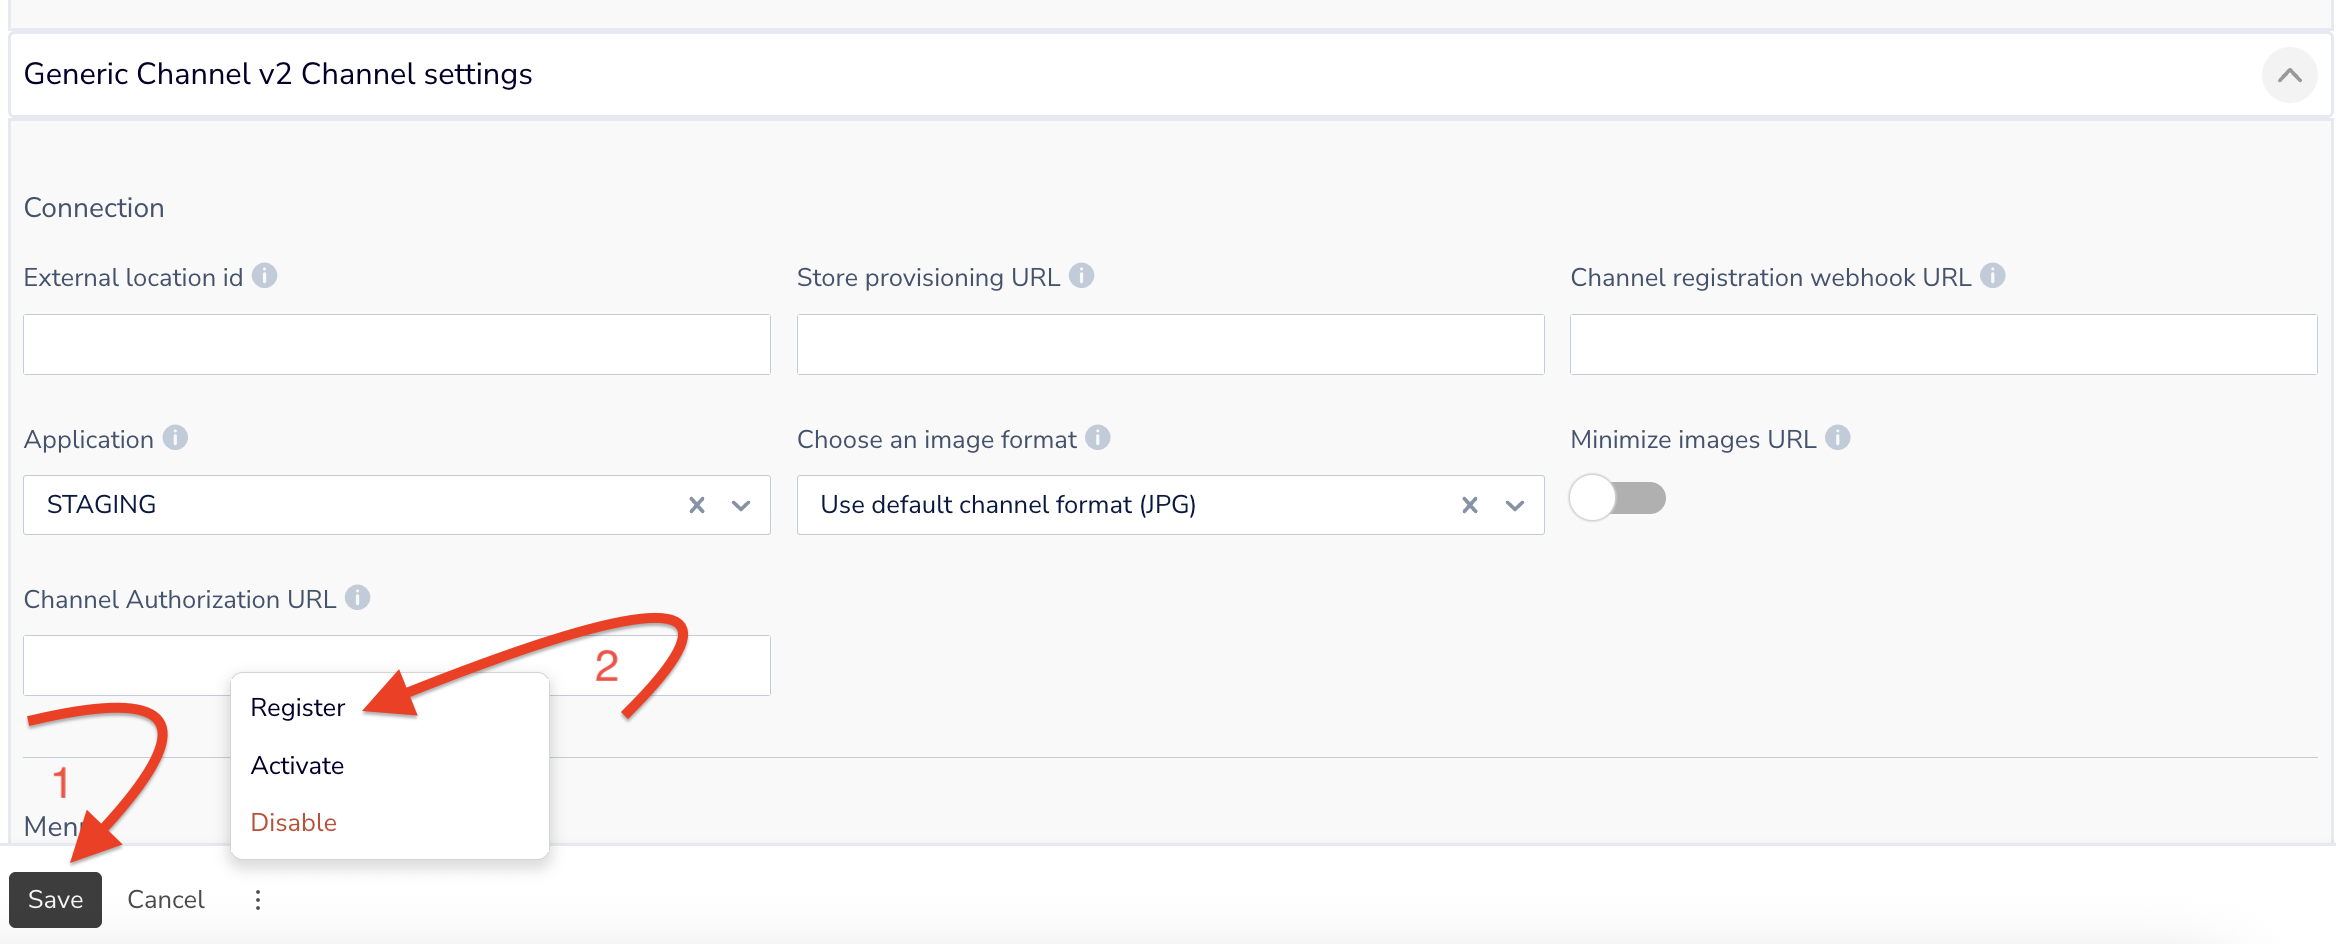
Step 4. Click on the Save button ①, then select the three dots next to it and choose Register ②.
How to know when a channel is activated, registered, or disabled
You will receive key status changes via the channel status webhook when users set one of the following statuses:
- Register
- Activate
- Disable
We also communicate the IDs of the channel link with each status change, in addition to the External Location ID (the unique ID for the customer on your platform).
Video
View a demonstration of these processes.
Updated about 1 month ago
Did this page help you?