Implement the Register Webhook URL
Introduction
The Register POS webhook URL is where we send the information of a new location that needs to be registered to your POS.
We will add the webhook URL to our backend once your integration is live in the production environment. While in testing, configure it in the Deliverect customer account settings in your staging environment.
Standardized URLThe register webhook URL needs to be standardized. In other words, the same webhook URL should be used for every customer install.
How to save your Register Webhook URL in staging
Step 1. Access your test customer account on our staging environment.
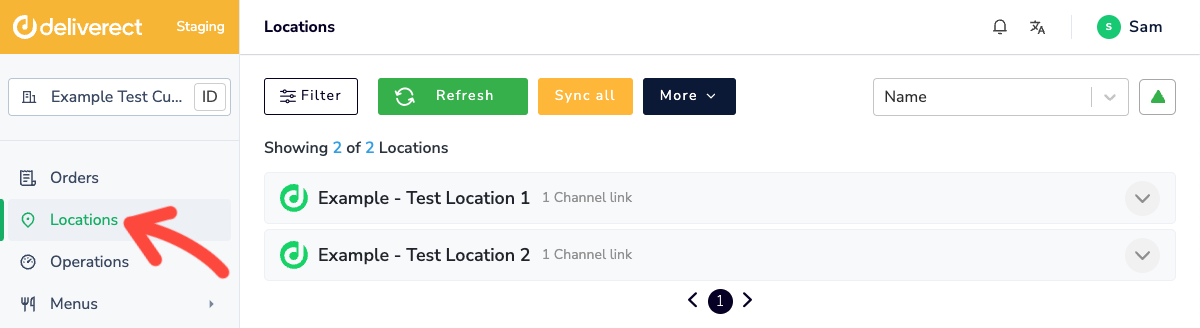
Step 2. Select Locations in the sidebar.
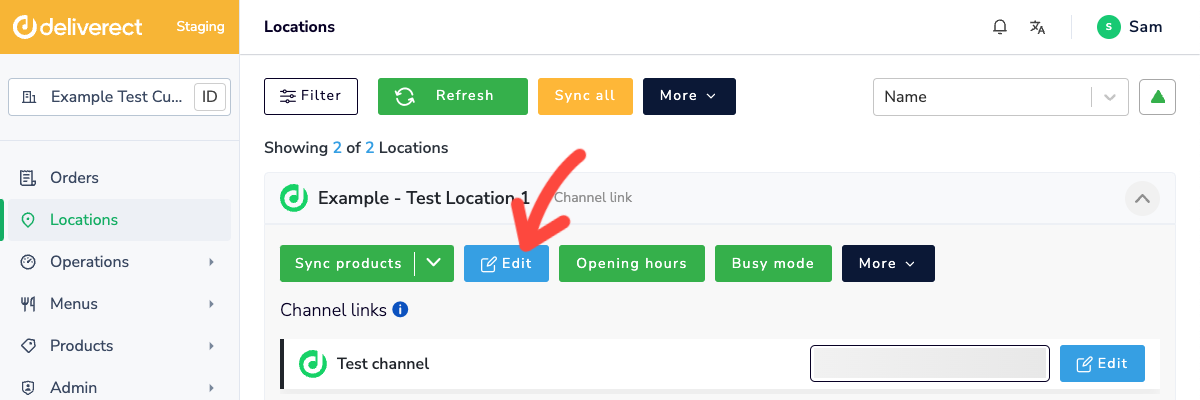
Step 3. Select the Edit button for the location.
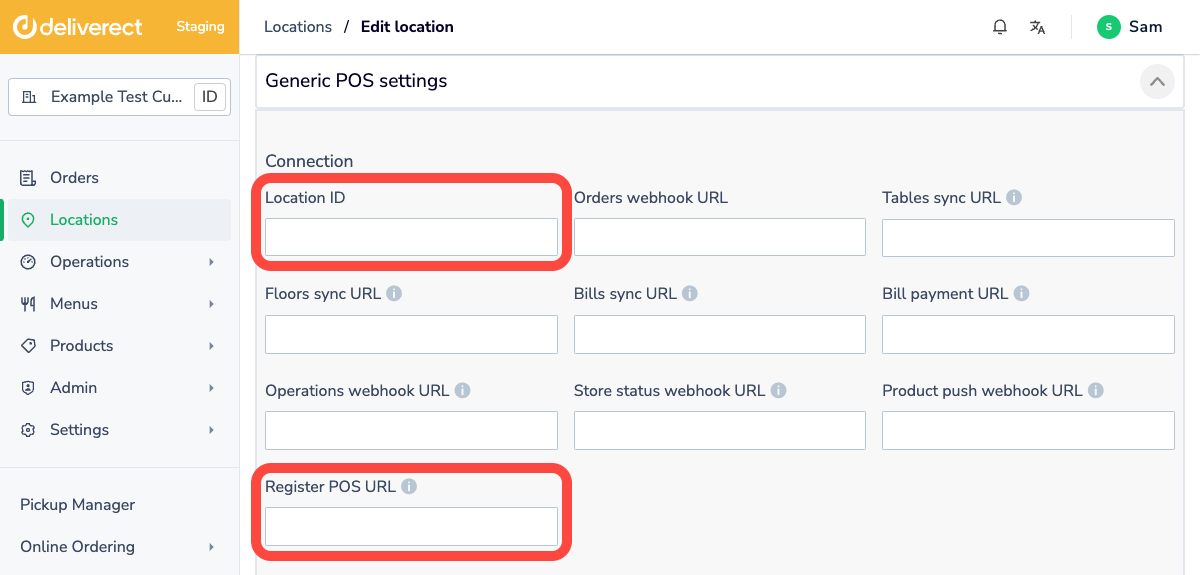
Step 4. Complete the following fields:
- Location ID: Enter the POS store ID of the location.
- Register POS URL: Enter the Register Webhook URL.
Location IDThe location ID shown in the settings refers to the External Location ID that comes from your side. Not to be confused with the Deliverect locationId.
Step 5. Click on the three dots at the bottom of the screen, then select Register with.
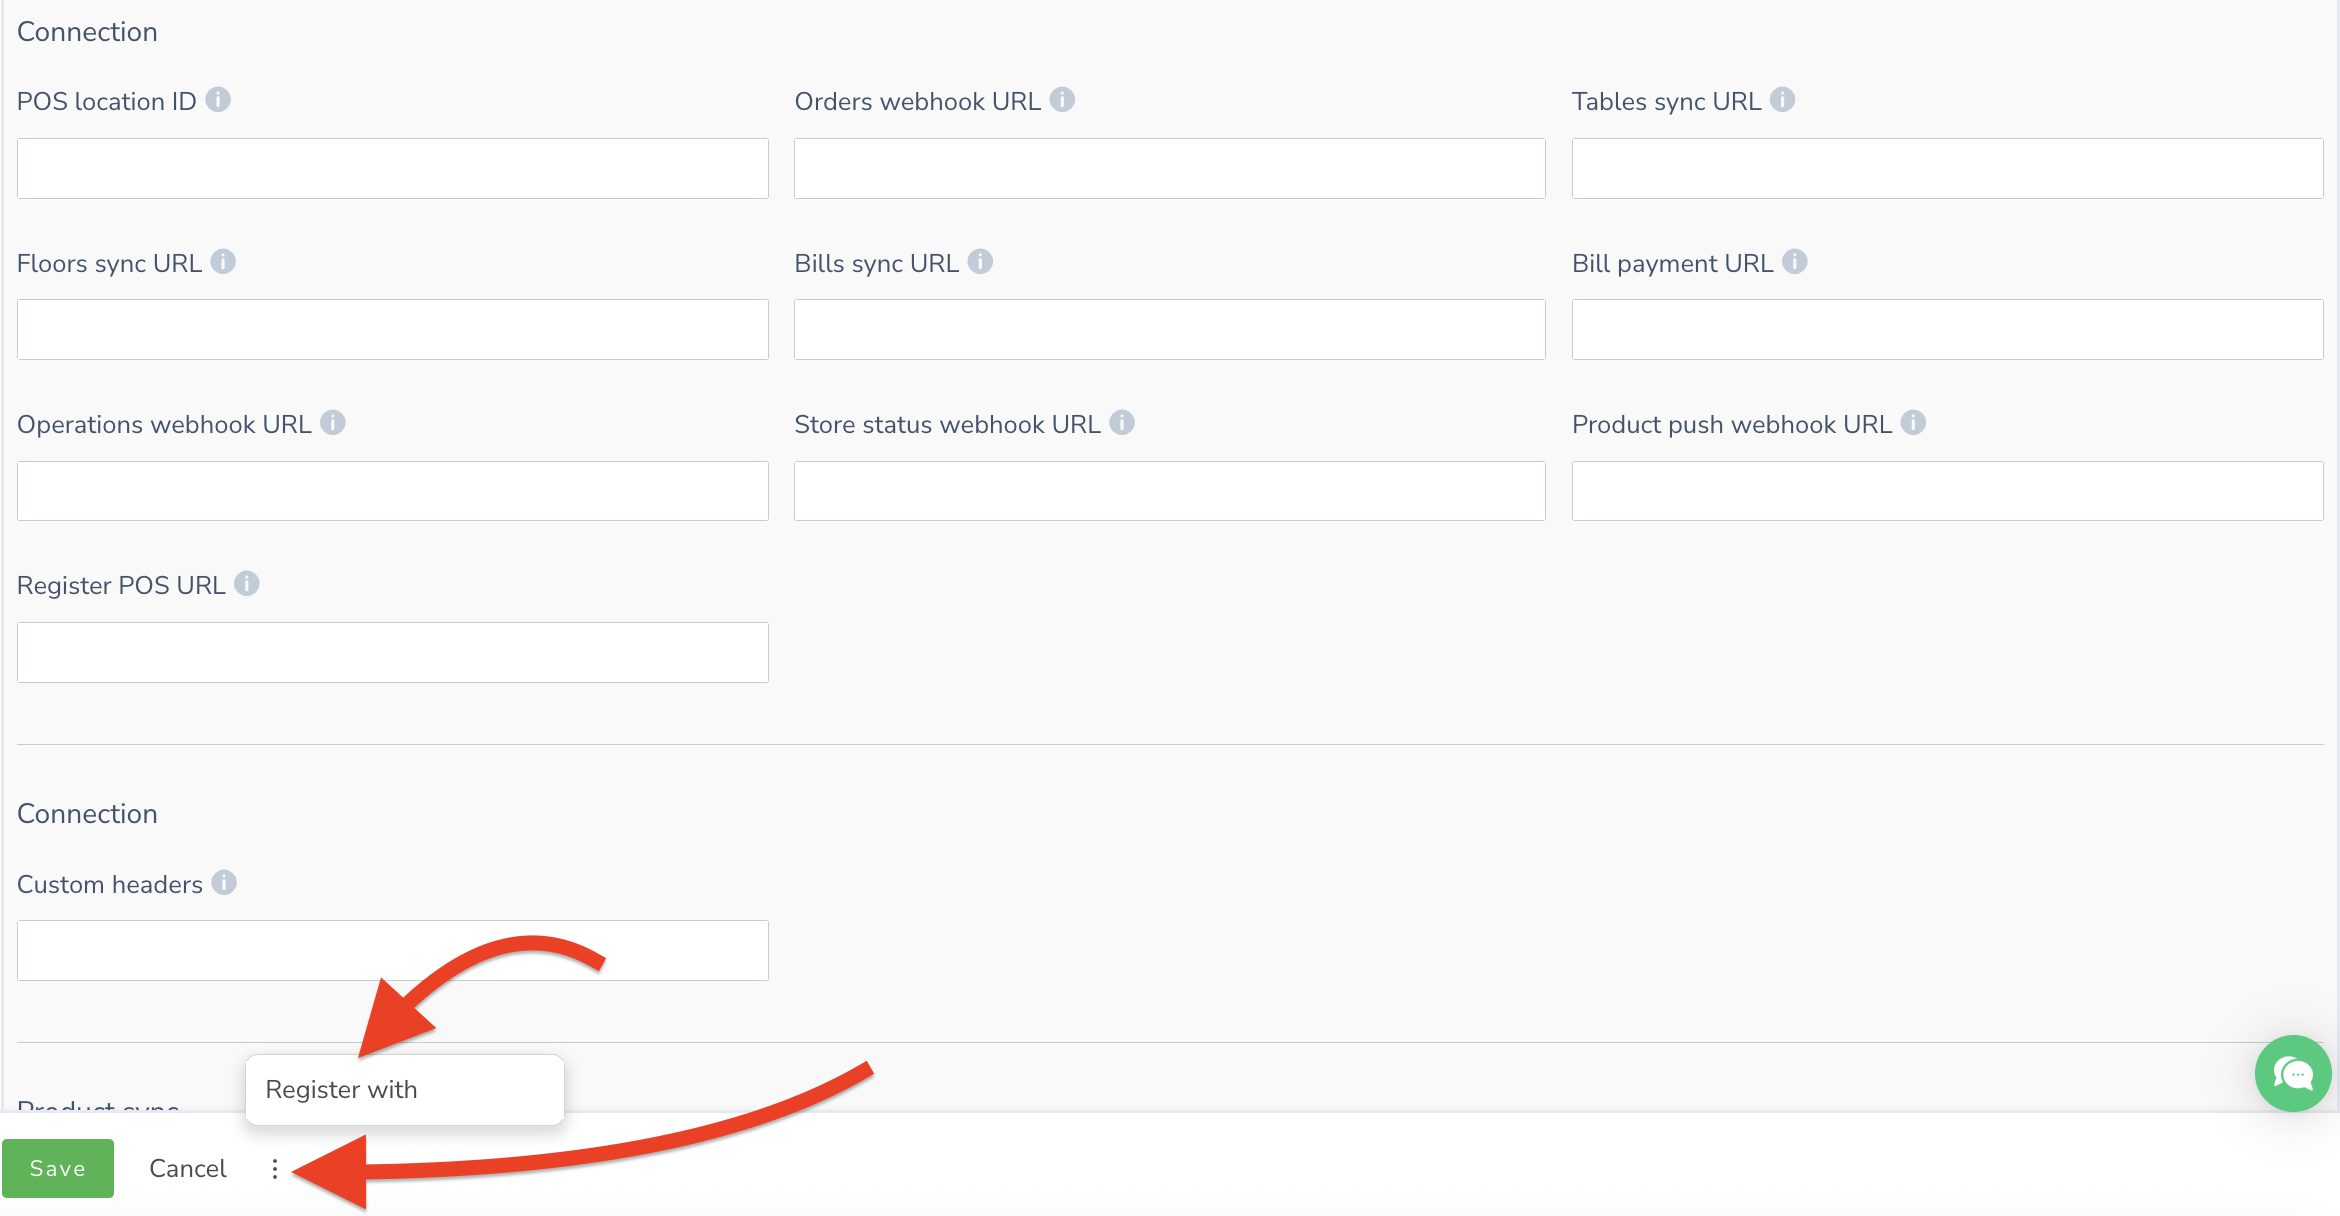
This triggers an API call to your Register Webhook URL. Deliverect will send you the following information:
{
    "accountId":"606d8489fcd8eddf5xxxxxx",
    "locationId":"606d8489fcd8eddf13xxxxx",
    "externalLocationId":"23A13DSDDXXXX",
    "locationName": "location name"
}
We expect your webhook to respond with the remaining webhook URLs for that specific location.
{
  "ordersWebhookURL": "https://integrator.com/ordersWebhookURL",
  "syncProductsURL": "https://integrator.com/syncProductsURL",
  "syncTablesURL": "https://integrator.com/syncTablesURL",
  "syncFloorsURL": "https://integrator.com/syncFloorsURL"
}
Updated about 1 month ago